Introduction
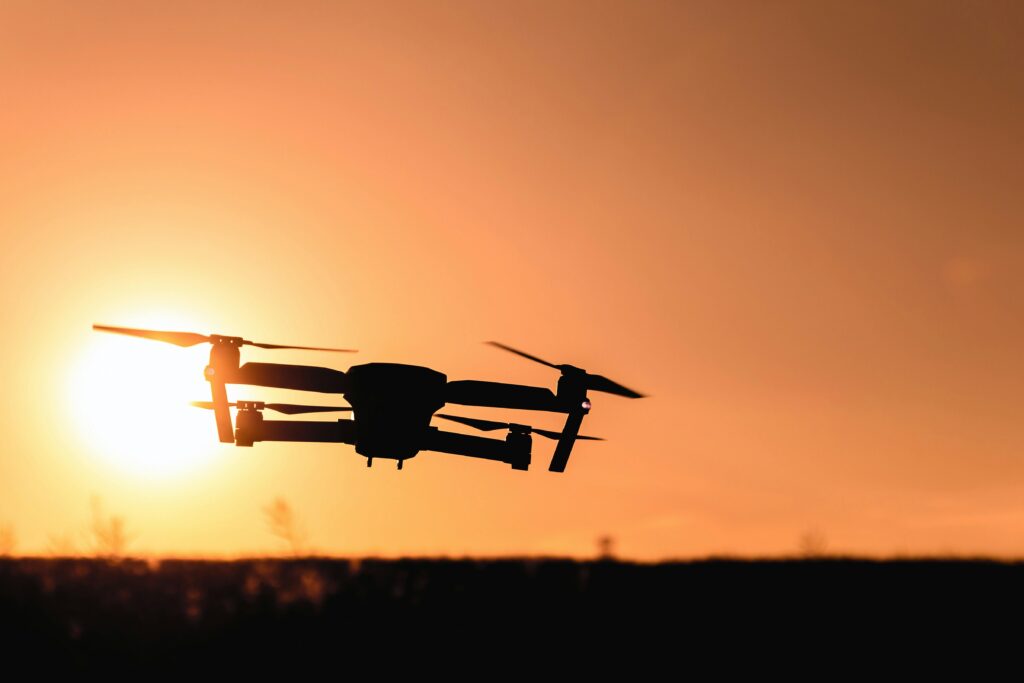
Capturing spectacular aerial footage using your drone opens up a whole new world of visual storytelling. Now, it is possible for you to capture sensational views related to flying landscapes and dynamic cityscapes.
Learn how to capture stunning aerial footage with your drone. Explore techniques and tips to enhance your photography and create captivating visuals.

Choosing the Right Drone
Before jetting off to capture that perfect shot, you need to select the right drone. Not all drones are created equal; some made just for casual use and others with high-end cameras and stabilizers for professional-grade results.
Understanding Drone Camera Specifications
All about cameras: capturing high-quality footage. Get a drone that offers at least 4K, and you’ll be getting high-resolution visuals with great detail and clarity for very catchy footage. Resolution aside, sensor size and low-light capabilities are huge aspects, especially if you want dramatic sunsets or city lights.
Importance of Stabilization in Footage
Such a key feature in trying to capture smooth, professional-looking footage is stabilization. Drones with gimbals will be able to manage steady shots regardless of how windy the conditions are. A gimbal works by locking the camera as it balances the drone so there’s no stabilization of shake or vibrations otherwise disrupting your footage.
Battery Life and Flight Time
Another must-be element in the list is flight time. Most drones usually give you anywhere from 20 to 30 minutes on a single battery charge. If your drone has a longer flight time, then you are bound to do more experimentation with different angles as well, therefore you get a bigger shot at getting that great shot. You will, of course, want to bring along spare batteries to extend shooting session.
Preparing for the Perfect Flight
Preparation for aerial filming depends on the following to ensure a smooth and successful flight.
Scouting the Location
Be very much familiar with the area even before you start filming. Identify interesting features in the landscape like obstacles or where the sunlight is most likely coming from. Scouting out the area early on can already help you set up your shots well and prevent those unwanted surprises once you’re flying.
Weather can make a huge difference in your video, so do check beforehand. Clear weather with minimal wind is preferable for shooting video using a drone. Somewhat cloudy weather can provide soft light, but rain or strong winds might be damaging to your footage and even the actual drone.
Setting the Right Camera Mode
Experimenting with your camera settings is fundamental in obtaining the best output. Of course, automatic mode is good enough for learning how to use the drone. As you progress, try manual settings for ISO, white balance, and shutter speed to get real vibrant colors, life-like, and sharp snaps.
Mastering Basic Drone Flight Techniques
To a great extent, aerial videography relies on smooth and controlled movement of the drone. Mastering some of these foundational flight techniques with your drone will be essential to the high-quality capture of aerial shots.
Take-off and Landing Best Practices
A smooth take-off and landing make sure you avoid shaky footage and damage to your drone. Start in an open area without obstacles; for every smooth launch and landing, advance to more complex surroundings as you gain confidence.
Control Speed and Altitude
If you are flying too fast or too high, then the footage may look rushed or unfocused. You can then create a more cinematic shot by practicing slow, steady movements and adjusting altitude with a little care. Flights lower and slower will enable you to get more footage as it deals with detailed land shots or detailed shots on buildings.
Using the Gimbal for Smooth Motion
The gimbal allows camera movements without the drone’s need to move. Pan or tilt slowly with the help of the gimbal so you can capture breathtaking perspectives while making the footage look more polished.
Tips for Different Kinds of Shots
One of the secrets to keeping footage interesting and visually interesting is through adding variety to the shots. Here are some shot types that you can try.
Wide-Angle Landscapes
For sweeping landscape shots, fly your drone high and use a wide-angle lens to capture the maximum possible scenery. This type of shot does a great job in depicting the extensiveness of a landscape. The viewer will feel involved with the scene.
Tracking Moving Subjects
Tracking shots can really invigorate footage. To track a moving subject, such as a car or a person, simply maintain a constant distance and speed so that the camera frames whatever angle you want as your subject changes. Always readjust the angle when your subject moves so that the video footage stays centered and smooth.
Close-Up Shots and Detail Capture
Taking the drone closer to the subject will enable you to get a higher resolution of shots. For instance, if one is focusing on a certain feature of the building or taking it closer to natural elements such as trees and rocks, then close flying is applicable to that subject. This approach works quite well with variety and visual interest in your footage.
Advanced Techniques in Cinematography
Ready to move your footage up a notch? Here are some advanced techniques that give your aerial videography that cinematic touch.
The “Dronie” Technique
A close-up and reveal: You begin near the subject and pull back to show the landscape around it. This is an excellent way of introducing the environment in a dramatic way, often adding depth and perspective to your footage.
Orbiting for a Dramatic Effect
Orbiting is circling around a subject to create a dynamic, 360-degree view. Sustained speed and altitude are essential for a smooth orbit. This shot is great for large, static subjects such as monuments or natural formations.
Orbiting around a subject to create dynamic, 360 degree views. Maintains a constant speed and altitude that results in smooth orbiting. This shot is very good for large static objects like monuments or natural formations.
Mastering the Fly-Through Technique
To fully immerse your viewers, try flying through it. That means maneuvering your drone through narrow passageways or intriguing formations. It is not easy, but with some practice, it can add a phenomenal, first person view that keeps your viewers on the edge of their seats.
Editing Your Aerial Footage for Maximum Impact
Editing is where your raw footage becomes a cohesive, gripping video. Using the right tools and techniques, you can make your footage look polished and professional.
Choosing the Right Software
Editing software for aerial footage includes powerful tools of Adobe Premiere Pro, Final Cut Pro, or DaVinci Resolve. The stabilization features in the software will be very important, as very minor shakes or vibrations in footage can sometimes ruin your work overall.
Color Grading for a Professional Finish
Color grading is another aspect that contributes to the atmosphere of your footage. You use brightness, contrast, and saturation to make your video cinematic. You try any which color grading technique that creates a feel for your clip.
Soundtracks and Effects
One can add a soundtrack or even sound effects in order to enhance the impact of footage. In this way, music will set up the tone and, along with sound effects such as wind or the call of birds, help in giving the sense of immersion. Ensure that audio elements complement and do not overpower the visuals.
General Mistakes to Avoid in Aerial Videography
Even the most seasoned drone operators miss things from time to time. Here are a few of the most common mistakes to steer clear of in working your way towards stunning aerial footage with your drone.
Flying Too High or Too Low
Flying at the incorrect altitude can either distort the perspective or make the subject seem insignificant. Remember to experiment with different heights to see what works best for each scene, balancing need for detail with a sense of scale.
Ignoring Battery Warnings
Monitor your battery level at all times. Most drones come with built-in warning and return-to-home capabilities, but it is still crucial to plan landings. Being mid-air with an instrument dead can lead to lost or damaged equipment.
Over the Need for Lighting
Lighting can either make it or break it. The golden hour-right after sunrise or before sunset-offers much softer lighting, which is ideal for capturing aerial footages. It would be best to avoid filming during the middle of the day because overexposure may happen.
Conclusion
Capturing impressive aerial footage with your drone is just as much about preparation and technique as it is about creativity. Using the right drone, practicing your flying skills, and mastering both basic and advanced techniques will help elevate your shots to professional levels. Every flight becomes a learning experience; it can’t be otherwise. So, do not think twice before experimenting. With enough time and practice, you are going to capture aerial footage that is more visually stunning yet an honest reflection of what you envisage creatively.
FAQs
Best time to capture aerial photography?
Capture aerial videos during the golden hour, or in the early morning or late afternoon when the sun is less likely to cause flare issues.
Is it possible to edit drone footage on my mobile phone?
LumaFusion and Adobe Premiere Rush are powerful editing apps available on your smart mobile phone.
Safety tips for shooting ariel shots?
Take precautions to avoid obstacles, track weather conditions to prevent wind or other elements from causing problems and monitor your drone’s battery to keep it charged.
How should I set my footage to be cinematic?
Cinematics footage are best captured with lower frame rates, e.g., 24fps and with a slight motion blur.
Do I need to have a license to fly a drone for videography?
Different countries require different licenses. You should first check your local regulations before flying.

